Thursday, December 31, 2009

Handmade Christmas Creations

There are so many creative blogs and bloggers out there I kept coming across projects and thinking, so and so would like this, and this... and that's where many of my Christmas gifts were born!
I took some ideas and changed them a little to suit the person they were going to and these are a few of the things that were wrapped under the Christmas tree this year:
I made this magnetic recipe/photo holder for my mother.
It has her style written all over it.
I got the tutorial from here:

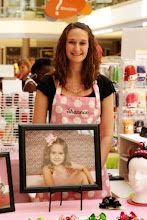
This was another gift for my mom.
It was a silhouette for her favorite (and only) granddaughter
A very enexpensive frame that I added jute to.
You can google search directions on how to make the silhouette
which was very simple to do as well.

This headband I created for my sister. She loves accessories.
I made an orangza flower with a seed beaded center, attached some tulle behind it.
Added some feathers and glued it all together onto a Goody's headband.
Here's a great tutorial on how to make the oranga flowers:
I think she wore it the night I gave it to her she liked it so much!
I made a few other things that I will post a little later.


December 31st

December has been such a joyfull month!
We had lots of great family time
and made lots of great memories.

My husband had never had a real Christmas tree so this year was the year! It was also Alyssa's first real live Christmas tree.

Alyssa got to meet Santa not once....

...but twice! The second time was more of a-

Being in the right place at the right time

Alyssa got to wrap a few gifts all by herself

We handmade ornaments for Alyssa to give to all the family members

We had a full day of cookie baking and made around 15 dozen cookies (or more!)

Alyssa was too cute in her apron and hat

Alyssa, being in pre-school now, got to attend her first class Christmas party!

Christmas Eve was filled with a family party, tracking Santa on the computer, and gifts from her Grandma, Great Grandma, and Great Aunt. She was so excited to put out the cookies for Santa and even though she was ready to go to bed so Santa would come she had a hard time getting to sleep.

Santa came Christmas Day!

Alyssa opening a gift from Santa Claus

During winter break we had a fun day at the Magic House in St. Louis with cousin Samantha
And finally we got enough snow to go outside and play, sled, and do her favorite thing - make snow angels.
2009 has been such a trying and yet rewarding year for our family.
We only hope that the New Year is filled with more family memories of good times.
Happy New Year from our family to yours!

Monday, December 21, 2009

Curly Christmas Hair

I wanted to get my daughter all dressed up for her PreK Christmas party today, but couldn't figure out what I was going to do with her hair. I decided to do the curly hair look. After her shower last night I sectioned off her wet hair and wrapped and twisted each section onto itself and secured each "bun" with a pony tail. This morning her hair was transformed into a Curly Sue style and she was just as cute as can be!


Monday, December 7, 2009

Free from Shabby Princess!


I seriously L-O-V-E Shabby Princess. My online store is even designed with graphics from Shabby Princess - http://www.crossinmyheart.com/ - "Wild Love" Digital Kit if you were wondering.

You can download an amazing kit for FREE from Shappy Princess!! It's a recipe collection which includes tags, lettering, cute card designs, covers, and even a "box" you can cut out and store the recipe card in! How cute! What a FABULOUS and FREE Christmas gift you can give to someone this year. What about birthdays, Mother's Day, Thinking of You gifts... gotcha thinking right??

Go here and download it now: http://www.shabbyprincess.com/


After you've download and unzipped the file open your kit in a photo program and you are on your way!

Thursday, December 3, 2009

Sewing Away

In the past I haven't gone near a sewing machine but maybe twice since my high school home ec class. I guess I've gotten brave in the week. I've seen so many blogs lately making lots of creative things and offering up some great tutorials. Here's what I've made myself!
These jeans I bought for my daughter in Aug. and by Oct. she had grown about a foot and never got a chance to wear them. They still fit in the waist so I added the ruffle to the bottom of the legs to add the needed length. I've seen these a lot, but couldn't find a good tutorial so I just wung it and I think it worked out pretty well!
This was my first appliqued t-shirt. I liked it a lot and then my mom brought home a pair of Dollar Store Christmas socks and a light bulb when off - make the socks into sleeves! I had another shirt of my daughters that was faux layered and used that shirt as a guide to sew the sleeves on. I cut the feet off the socks and used the excess fabric from the socks to cut out circle and made a layered flower style hair clip too. (Not pictured)
I got extra brave with this shirt. I appliqued the front and sewed on the 3-D bow to the top of the Christmas gift. The sleeves were pretty long on my daughter so I cut off about 4" and added matching green polka dot cuffs. I also used the 4" of red material from the sleeves I cut off from the shirt and sewed straps to the cuffs. I still would like to add Christmas buttons to the straps on the cuffs.
Who knows what I'll get into next! Stay tooned! I'm feeling extra crafty these days!


Monday, November 30, 2009

Flowers Galore!

Shabby Flowers:

I've been busy making these flowers. These are a couple of photos of my daughter wearing them They are very easy to make, I just tear the fabric instead of cutting it making things much faster. I put them on hair clips and attached them to these kufi hats, but they would be adorable on headbands, shirts, or anthing that needs that extra touch.

Here's the tutorial:


Fabric Folded Flowers:

I love these flowers as well. They still need centers on them, but they will become hair clips soon.

Here's the tutorial:

Fabric Folded Flowers

I've also been working with organza to make organza flowers. I've made bobby pins with these flowers and the necklace featured on this blog:

Organza Flower Necklace


Tuesday, November 24, 2009

Where does the time go?

I can't believe I haven't posted in nearly a month! Here's what I've been doing to make my postings few and far between -


This was actually my 4th big craft show (3rd at this location) with my new grid panels. I've been focusing a lot on getting my Bow Business to grow. I have had so much fun and my display has changed a lot since my first craft show over a year ago. Here's a quick look at then to now:

This was my very 1st craft show which was over a year ago.
It was at a local nursing home... live and learn.

This was my 2nd craft show at our local school last year as well....

and now for THIS YEAR:


I took a leap of faith and paid $300 to be in this expo at a huge mall during the states tax free weekend. They expected 150,000 people to go through the mall that weekend and WOW, glad I did it! Now I'm hooked!


This was another mall expo. We had a cart this show. At the time I thought it was really neat, however, I couldn't display much on there like the tables.


This is the same mall as my first mall expo pictured above, just a much better location. We were in the middle of a triangle with Gymboree, a toy store, and the huge playground. The food court was just behind us too.

Which brings us back to the here and now. I decided since we are doing all these shows we should invest in some grid panels. I do like them, but I'm still trying to figure out the best way to utilize them.
Believe me - I've been trying to create as much cute as possible and doing my best to do it in the most economical way I can, I just haven't been posting them because of lack of time lately.

You can view all my products at my online store:
www.CrossinMyHeart.com


Friday, October 30, 2009

Witch's Tea Party Part 1 - Decor

Happy Birthday.... TO ME! To celebrate the occasion as well has Halloween I planned a Witch's tea party! It was more of a birthday party/Halloween party/play date and SO MUCH FUN!

On this first post I'll take you through the decor - don't forget to read the next post about the activities and the menu.That's me! And my sweet as can be daughter Alyssa

This is my long time friend Kelly and her precious little girl Samantha

Here the dining room where were had the party

I decorated the corner shelf to look like a shelf that might be in a witch's lair.

The skull what a dollar store find as well as all the of the battery operated tea lights. I wrapped bottle with labels I found online and filled the empty bottles with colored water.

Just a few odds and in with more bottles and candles. I did wrap this "Boo" candle with scrapbook paper and added the laser cut letters. The hurricane glass I also added a black cat jell sticky to.

The centerpiece of the table was a cauldron candy bucket filled with lime green tulle. Under the cauldron is white tulle and fake barbed wire rope. I saw this "wicked" decoration and had to have it being for a WITCH's tea party. It worked out well front and center on the table.

This was one of the girl's place settings. I just used colored construction paper for place mats and drew on the spider web and wrote in their names with black markers.

These cute little sipper cups are filled with milk. I painted on melted chocolate and let it dry before adding the milk.

These mini cauldron's were at the girl's place settings as well. I added a sticker and a small knot of ribbon and put crayons in them for them to draw on their place mats.

This was one of our "adult" place settings. Nothing special, but a black mug and spoon for our tea.

I saw this idea online and thought - HOW CUTE! These are a pair of my shoes that my husband has actually called my "witch shoes." I stuffed these striped socks with newspaper and put them under our recliner, which was visible from the dining room.

Here is the food/snack/desert table. The cauldron to the left is filled with aluminum foil on the bottom and green lights on top to help illmuminate, then green spider web on top to hide the lights. An inflatable black cat sits next to the cauldron.
You can read more about the room and other items on this table in the next post.